
3D Match Moving
3DE OverView
3D Equalizer is a 3D/ 2D tracking software, Which enables us to make manual tracker point to track a scene and get most accurate tracking.
Basic and Process of 3D Equalizer
When we open 3DEqualizer you will be seeing this window below...

There are some shortcut keys which will be really handy when it comes to using this software.
Short Cuts (MAC)
Arrow Left or Right - One frame back or front
Space bar - Play
T - Track Start/Stop
Ctrl + Click - Create track Point
Ctrl + Z - Undo
F - Full Frame view
I - Image control toggle
X - Gauge Marker
E - End frame
F2 - Manual tracking view
Opt + Drag - Select point in view
F - Flip Direction

Right, Click > Define shortcut... > Under shortcut enters the letter or key which you want to use. Then Click on "Use Shortcut"
to Create Shortcuts...
Sensor Size / Focal Lenght
To use the 3D Equalizer we should input the details about the camera (DSLR / Camcorder) and its Sensor sizes. There are different sensors with different sizes but in here at University we have tried with Sony NEX-FS100 & Canon 5d MKiii. These two different cameras have two different sizes of the sensor.
Width of the Sensor
Height of the Sensor
Focal Lenght of the Sensor
This three information have to be noted in order to get the correct and stable tracking.
Why we have to give the camera Information to 3D Equalizer?
Because when we track with the distorted lens which it won't give the correct information. If you see below you will see what is a lens distortion.
Focal Length
Focal Length is a distance and where you're focused in a simple form if you have used DSLR which When you focus only the certain area will be sharper then others in the foreground and the background will be blurred out that's what it is.
Lens Distortion
Lens distortion is a

Bitesize 1
Bringing in footage to 3D Equalizer. First we have to export the video file to JPG format which is image sqence n order to import to 3D Equalizer.

This is the basic software when its opened.
This is where all the project setting and the importing footage will be under camera menu.
When you open this menu you will see the menu which i included under this image.
This is where we input our camera lens & sensor sizes.

This is where the image squence will be input.
On this panel we have the file import and the sequence start frame/ end frame counts.
On this Lens information panel, As we can see the menu of focal length and pixel aspect and others. When we give more information about the camera to our lens information. tracker will be more stable. On this menue we will be feeding the information of sensor size to Filmback Width / Height. then the Focal length is the focus point and pixel aspect will be 1 means the it will stays the same size of the original footage.
This is where the image squence will display.

Bitesize 2
I’m a paragraph. Double click here or click Edit Text to add some text of your own or to change the font. This is the place for you to tell your site visitors a little bit about you and your services.
Bitesize 3
Showreel, LinkedIn and Business Card
Bitesize 4
I’m a paragraph. Double click here or click Edit Text to add some text of your own or to change the font. This is the place for you to tell your site visitors a little bit about you and your services.
Pipeline
Showreel, LinkedIn and Business Card
Applying Grid Data
I’m a paragraph. Double click here or click Edit Text to add some text of your own or to change the font. This is the place for you to tell your site visitors a little bit about you and your services.
Creating an Image Sequence
Showreel, LinkedIn and Business Card
Pipeline from 3DE to Nuke and MAYA
Showreel, LinkedIn and Business Card
Hints & Tips
I’m a paragraph. Double click here or click Edit Text to add some text of your own or to change the font. This is the place for you to tell your site visitors a little bit about you and your services.
Assessment 1 - 3D Tracking Task1
On this Assessment we were given to track a 3D scene, min of 40 tracks and to add the locaters to see if all tracker marks are smoothly tracked. Then finaly add a 3d simple object inside 3D equalizer to see if all the tracker marks are working and the object is staying in place.

When I started tracking I was looking for 3 stage of tracking places. One foreground, background, and the floor. so when the tracker markers calculated the object will stay in place.
This is the scene which I have told to track.

After placing the tracker markers the 3D Equalizer will calcualte the trackers and create a camera movement.
After the calculation, if the red dots align with the movement of the camera you can take this information to tune the trackers to get the smooth scene.
Using the calculation results this graph will show you that all the tracker markers stay in place. or if there's any tracker gone wrong.

Those arrows over the tracker mark are called locators which shows the difference in the dept by sizes of arrows on tracker markers.

After all the calculation and the locator i have added a object to see if it tracked fine then i have exported Camera, LD data, locator geo, and 3d models to Nuke

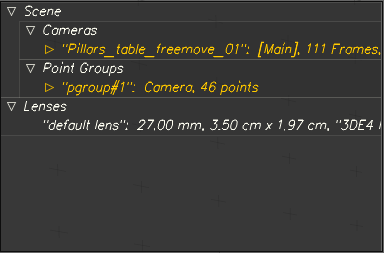
Final Handed in Scene
Final Assessment hand in files to Download :-
https://drive.google.com/drive/folders/1mpynYVGfUk18BVNThJEBCqD4_d8NOSef?usp=sharing
Assessment 2 - 3D MatchMoving Task 2
On this Assignment I have the choice to videos free move handheld shot of a green screen then I used 3DEqualizer to match move the clip and created a theme of AI future system which is used in UWL.

So i have created a AI face with cubes. then modeled a look of a reception desk and a banner which is being animated with ncloth. then also added a cloth over the coffe table.

The arrows on the scene is called loactors which helps to see the depth and tracks. after the track i have tested the stability with a cube. then using the Nuke roto-paint clone i have removed all the tracker makers.
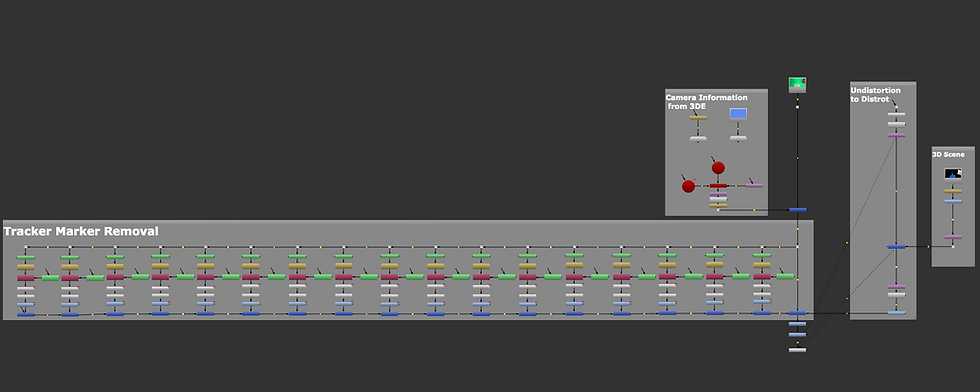
This is my node graph in Nuke X. This shows my work flow and the information what i have done.